No right-click allowed. © Mareike Keicher

Tag : Sharpening

sharpening for billboards

Learn the Optimal Image Sharpening Formula for Printing


We understand the issue at hand – you want to ensure your edited image is clean and print-ready, and therefore, seek appropriate resharpening techniques. Typically, most people tend to open a sharpen filter and adjust the radius until the image appears acceptably sharp. However, it is important to note that images require more sharpening for printing than for screen playback.

But was everything done correctly? Most likely not.

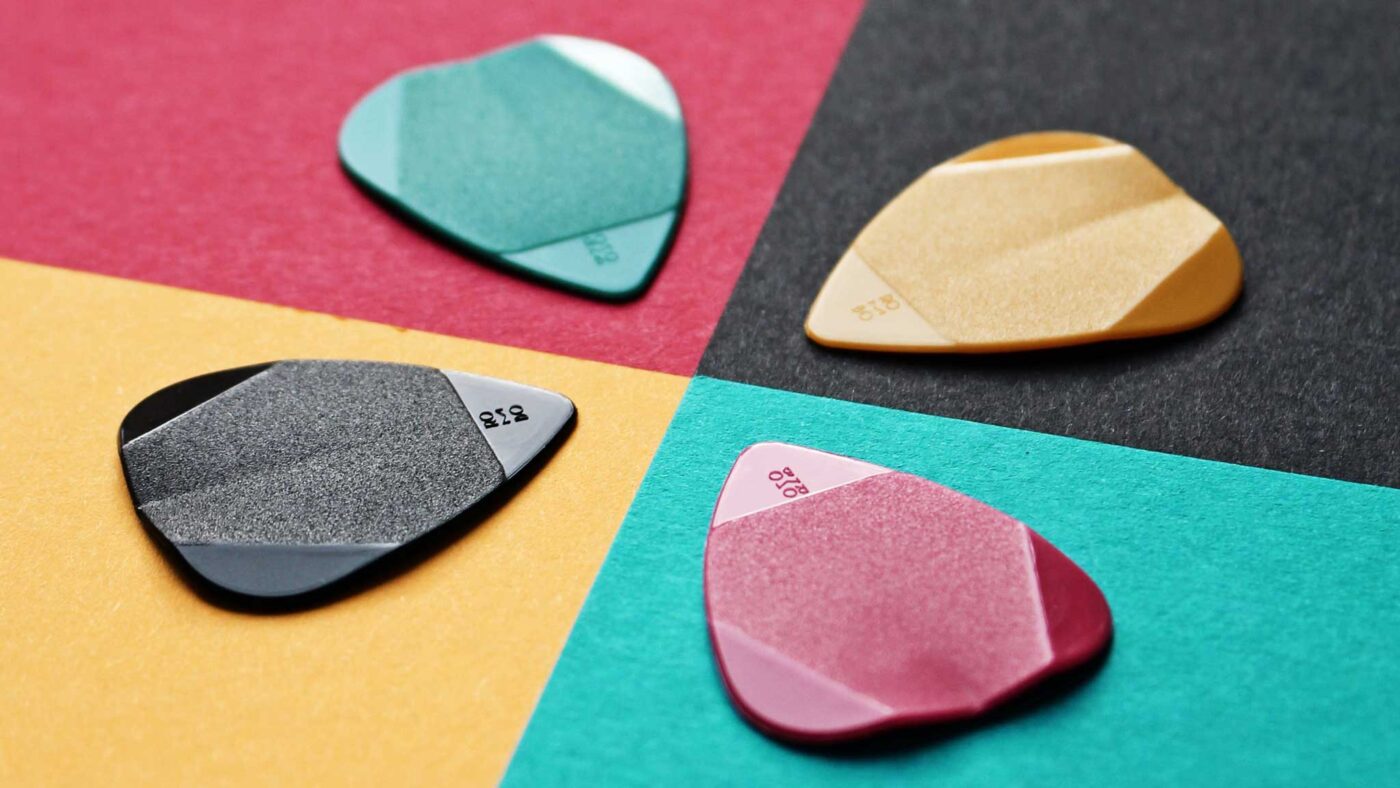
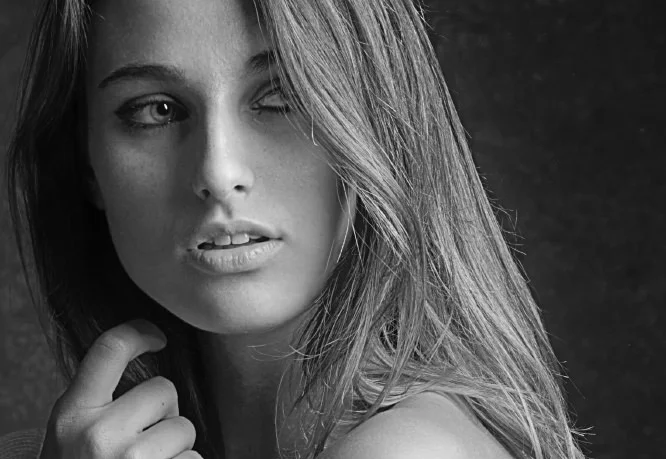
If you frequently work with images and are skilled in retouching, you can easily identify an image that has been over-sharpened. Often, over-sharpening leads to dry-looking hair and overly sharp skin.

The formula of happiness

Fortunately, there is a formula for printing that provides optimal sharpening!

There are several variables to consider when sharpening images:

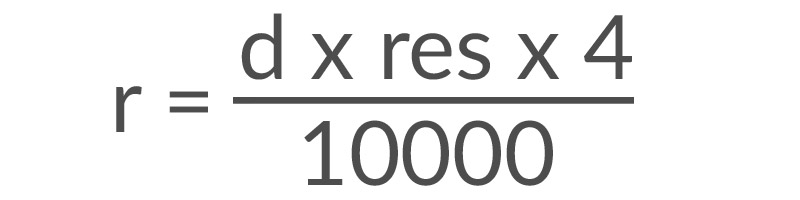
  • The first variable is the radius (r). The radius is a value used in Photoshop’s unsharp masking feature, as well as in sharpening methods in Capture One. The goal is to determine the appropriate radius value.
  • To do this, we must determine the distance (d) from which the image will typically be viewed. For this formula we use the unit inches for the distance (1 inch is equivalent to 2.54 cm).
  • In addition, we measure the image’s resolution (res) – a crucial factor – in dots per inch (dpi).

An Example

Let’s consider an example to see how this works in practice. Suppose I want to display a stunning family picture on my living room wall and aim for maximum sharpness. My couch is located 4 meters away from the picture, and I sit there every day. This viewing distance of 4 meters corresponds to 157.48 inches. Assuming my image has a resolution of 240 dots per inch (dpi), we can perform the following calculation:

The result of the calculation is a sharpening radius of 15.11808,  rounded to 15.1 since Photoshop does not allow for precise values.

However, it’s important to use this value with caution because it’s based on the assumption of an optimal print medium, which doesn’t always exist. For instance, if you plan to print on canvas or matte paper, you may need to consult with your print provider. As an alternative use techniques such as smart-objects or sharpening on separate layers for more precise adjustments.

Nonetheless, one important takeaway is that the size of the image doesn’t matter when it comes to sharpness. Only the viewing distance and resolution per inch determine the appropriate level of sharpening.

Background information: Why does viewing distance matter in the sharpening process?

The viewing distance is important because it determines which details our eyes can perceive from a distance, and these details should correspond to the sharpness radius. If you find the idea of manually filling out formulas daunting, you can use a convenient calculator available on the German website www.fineartprint.pro, which is worth bookmarking.

The insights in this article are based on the work of Paul Santek, the operator of the mentioned site. I had the pleasure of attending one of his sessions at the BarCamp event, and I was impressed with his knowledge of printing.

If you missed last week’s blog post, you can find additional information on sharpness here.

If you have any suggestions, additions, or notice any errors in this post, please feel free to leave a comment. We appreciate every recommendation and encourage you to share this post.

Photo by ROMBO from Pexels

Sharpening & Contrast: The Ultimate Guide to Achieve Perfectly Sharp Photos

You keep seeing them again and again: images that are over-sharpened to the point of looking ridiculous. Halos around people’s heads make them look like funny versions of Jesus, hair appears super dry, and somehow everything just looks cheap.

So, what exactly is sharpness?

Sharpness refers to the contrast between different elements in an image. This can include differences in brightness at edges and details, as well as color contrast or saturation contrast. In fact, even the content of an image can affect its sharpness.

When sharpening images, Adobe Photoshop looks for edges and enhances them by making one side lighter and the other darker. However, Photoshop doesn’t take color contrast into account – it can only manipulate luminance contrasts:

Let’s take a closer look and do the same thing again:


Take a look at the eye – it looks really sharp in this image. Unfortunately, this comes at the cost of the skin texture, which looks a bit rough, and the hair, which appears dry and straw-like. The hands also seem to be overly bright and have an unnatural glow to them.

Fortunately, there is a great “manual tool” available for adjusting luminance in images: Dodge & Burn. With this tool, you can adjust the brightness of specific areas of the image to bring out more detail and make the image look more polished.

In this particular example, I used Dodge & Burn to manually sharpen the image. As you can see, the eye looks sharp without any negative side effects. Interestingly, this only took me about 2 minutes to do.

Sharpness through color contrasts

Let’s take a look at this image here:

These two colors are very similar – the red and the orange are almost identical, with only a small difference in their hues. The saturation and luminance of both colors are the same. However, if we change the hue of one of the color fields (while keeping the saturation and luminance the same), we get a completely different result:

The contrast between the two fields is so strong that even JPG compression struggles to accurately display the image. As a result, we can see visible artifacts in the middle. It’s amazing to see how much of a difference a simple change in color tone can make.

If you were to apply this concept to an image, you could do so in the following way:

By making only a minimal adjustment to the color tone, a sharper image was produced. It’s a very subtle effect, but it works wonders without any negative side effects.

Conclusion

In conclusion, if you want to achieve sharp images, it’s important to keep contrasts and contrast edges in mind when retouching your photos. This approach can often make subsequent sharpening unnecessary. When using Dodge & Burn, I always try to darken the edges a little more and lightly lighten the other side of the edge. With colors, it’s important to pay attention to color harmonies, so that you can achieve harmonious and sharp contrasts at the same time.

A little hint at the end

A final tip: if you try to sharpen your image while using the raw converter or increase the saturation, you may get a sharper image initially, but it will require twice the amount of work to eliminate any resulting problems. It’s better to use raw conversion to create a flatter, but balanced image and then deliberately increase the sharpness during retouching.

Stay tuned for our next blog article on sharpness, which will be published next week!

Do you have any suggestions, additions, is this post out of date, or have you found any mistakes? Then we look forward to your comment.
You are welcome to share this post. We are very grateful for every recommendation.